 English
 中文简体
中文简体High Puncture Resistance Liner: Choose, Fit, Install, Prevent Flats
Content
- 1 How a high puncture resistance liner prevents flats
- 2 Choosing the right liner: material, thickness, and real-world examples
- 3 Sizing and compatibility checklist
- 4 Installation that actually works (and avoids tube damage)
- 5 Trade-offs: protection versus ride feel and efficiency
- 6 Alternatives that can outperform a liner in specific scenarios
- 7 Maintenance and troubleshooting for liner setups
- 8 FAQ: high puncture resistance liner decisions
A high puncture resistance liner is a protective strip installed between your tire and tube that dramatically cuts flats from glass, thorns, and wire—when it’s sized correctly and installed without sharp edges.
For most riders, the practical “sweet spot” is a liner around 0.9–1.3 mm thick matched to your tire width, with careful trimming and overlap control to avoid tube chafing.
How a high puncture resistance liner prevents flats
A liner works by adding a sacrificial barrier that sharp debris must penetrate before it reaches the tube. On impact, it spreads the point load over a wider area, buying you “penetration distance” and time for the tire casing to deflect.
What “puncture resistance” really means in measurable terms
In standardized PPE testing, puncture resistance is literally measured as the force (Newtons) required to push a probe through a material. While bike liners aren’t typically sold with EN/ANSI puncture ratings, this measurement concept explains why thickness, stiffness, and fiber reinforcement matter: higher force required usually means fewer punctures in real use.
- A liner helps most against thin, sharp hazards (glass shards, goatheads/thorns, fine wire).
- It helps less against large nails/screws at speed (high energy impact can still defeat the stack).
- It does not prevent pinch flats from low pressure + curb hits; inflation and tire volume handle that.
Choosing the right liner: material, thickness, and real-world examples
“High puncture resistance liner” is not one material. Most bicycle liners are polyurethane-based strips; some systems use thicker foam-like inserts. Your best choice depends on your flat hazards, acceptable weight, and how sensitive you are to ride feel.
A practical selection rule that works
If you’re fighting thorns and urban glass: prioritize a liner in the ~1.0 mm class with good width coverage. If you’re fighting frequent punctures on loaded bikes or e-bikes: step up thickness/coverage, but expect more rolling resistance and installation sensitivity.
| Option | Type | Thickness | Typical weight (per wheel) | Best use-case |
|---|---|---|---|---|
| Mr Tuffy (standard/ultralite) | Polyurethane liner | ~1.1 mm | ~61–63 g | Everyday commuting; glass + thorns |
| Zefal Z-Liner | Polyurethane liner | ~0.9 mm | ~62 g | Balanced protection; moderate ride impact |
| Panaracer FlatAway | Polyurethane liner | ~0.7 mm | ~29 g | Light protection; performance-oriented commuters |
| ProLine Anti-Platt | Polyurethane liner | ~1.3 mm | ~110 g | High-debris routes; heavier-duty protection |
| Tannus Armour | Foam insert system | ~12 mm | ~221 g | Maximum flat reduction; accepts ride/weight trade-offs |
| SmartGuard-style built-in belt | Protected tire (not a liner) | ~5 mm | Varies by tire | “Set-and-forget” puncture protection without liner fit issues |
Use the table as a decision aid, not a guarantee: the “most puncture resistant” choice is the one that covers the tread area, stays centered, and doesn’t create new failure points (tube chafe, trapped grit, or sharp liner edges).
Sizing and compatibility checklist
Correct sizing is what turns a puncture-resistant liner into a high puncture resistance liner. A poorly sized liner can migrate, wrinkle, or abrade the tube—creating the very flat you were trying to avoid.
What to match
- Wheel diameter: match 26", 27.5", 29", 700c, etc. Too long creates overlap bulk; too short risks gaps.
- Tire width: liner should cover the tread area without climbing far up the sidewalls (sidewall climb increases tube friction).
- Tire type: liners are primarily for tube setups. For tubeless, use purpose-built puncture inserts or sealant strategy instead of a conventional strip liner.
- Rim tape condition: fix rim tape first. Many “mystery punctures” are rim-side failures, not tread punctures.
Quick decision guide
- If your flats show a sharp object stuck in the tire tread, a liner is a strong fit.
- If flats happen after curb hits and show two small “snake-bite” holes, raise pressure and/or increase tire volume instead.
- If holes appear near the valve or rim-side, replace rim tape and inspect spoke holes before adding any liner.
Installation that actually works (and avoids tube damage)
Most liner failures are installation failures. The goal is a smooth, centered strip with no sharp transitions and no trapped debris.
Step-by-step best practice
- Remove the tire and tube, then clean the inside of the tire casing (grit trapped under a liner can abrade a tube).
- Place the liner inside the tire so it sits under the tread area; keep it centered and flat with no folds.
- Trim length if needed so the ends meet with minimal overlap. If overlap is unavoidable, keep it small and place the overlap away from high-stress zones.
- Round and smooth the ends (no square corners). Sharp corners can chafe the tube over time.
- Partially inflate the tube (just enough to give it shape), install it, and mount the tire. Ensure the liner does not shift while seating the bead.
- Inflate to operating pressure and spin the wheel to confirm the bead is seated evenly. Re-check after the first ride.
Two small details that prevent most problems
- No sharp liner edges: smoothing and rounding ends prevents “mystery” slow leaks caused by tube abrasion.
- No trapped grit: wipe the tire interior and liner before final assembly; debris can saw through a tube over miles.
Trade-offs: protection versus ride feel and efficiency
A high puncture resistance liner adds material under the tread. That commonly increases rolling resistance and can make the tire feel less supple, especially with thicker strips or foam insert systems.
What you should expect in practice
- Weight increase: many strip liners add roughly 30–110 g per wheel, while heavy insert systems can add far more.
- Ride quality: thicker protection can damp small vibrations but may reduce “liveliness” in cornering.
- Heat and friction: poor fit can increase tube friction; correct centering and smooth ends matter more as thickness rises.
If you value speed over everything, use a lighter liner class (or a puncture-protected tire) and focus on keeping debris out of the tread. If you value reliability (commuting, touring, cargo), prioritize coverage and installation quality.
Alternatives that can outperform a liner in specific scenarios
Sometimes the best fix is not an added liner, but a different puncture strategy that eliminates liner-related failure points.
When a puncture-protected tire is the better “high resistance liner” choice
Some tires integrate thick protective belts under the tread (often several millimeters thick). This approach removes fit/shift issues and is ideal for commuters who want a consistent setup without periodic liner adjustment.
Other options to consider
- Sealant in tubes: can seal small punctures; effectiveness depends on hole size and sealant freshness.
- Tubeless with sealant: best for frequent small punctures; requires compatible rims/tires and maintenance.
- Debris management: regular tread inspection and picking out embedded glass can reduce punctures with no added weight.
Maintenance and troubleshooting for liner setups
A liner is not “install once and forget.” Quick periodic checks keep it high-performing and prevent tube wear.
Symptoms and likely causes
| Symptom | Most likely cause | Fix |
|---|---|---|
| Repeated slow leaks, no visible puncture | Tube abrasion from liner end or trapped grit | Remove, clean, round/smooth ends, reinstall centered |
| Flat shortly after installation | Pinched tube during mounting or liner shifted into bead area | Install with partially inflated tube; verify liner stays under tread |
| Punctures still happening in tread zone | Coverage gap, liner too narrow, or high-energy punctures | Use wider/thicker liner, or move to puncture-protected tires/inserts |
A simple routine helps: inspect tread weekly (or after debris-heavy rides), remove embedded shards early, and re-check liner position whenever you replace a tube.
FAQ: high puncture resistance liner decisions
Will a liner stop all flats?
No. It materially reduces punctures from common sharp debris, but it cannot eliminate pinch flats, valve failures, or major fastener punctures at speed. The best results come from liner + correct pressure + debris checks.
Is “thicker” always better?
Not always. Past a point, added thickness increases rolling resistance and installation sensitivity. For many commuters, a well-fitted ~1.0 mm liner outperforms a thicker liner that shifts or abrades the tube.
What’s the fastest way to improve results if punctures continue?
First: confirm the puncture is tread-side, not rim-side. Second: verify liner width/centering and smooth ends. Third: upgrade to a puncture-protected tire or an insert system if your route is consistently severe.
-
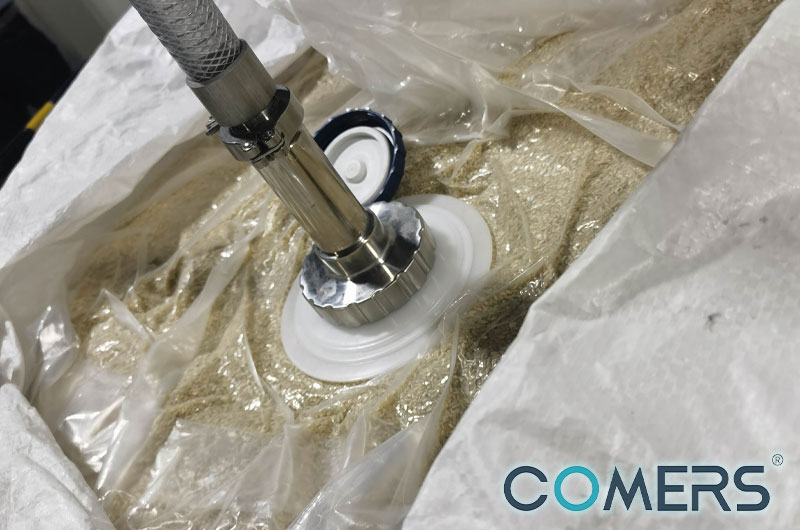
Intertram®FIBC Liners
+ Permanent anti-static / temporary anti-static
+ High barrier performance
+ Single material
+ Prevent from moisture, oxygen(low WVTR<3.0,OTR<1.0)
+ Various film types and thicknesses (Length:1M1-2M2 Thinkness:30-160um)
+ For milk powder/ coffee powder
+ Effective barrier and product protection
+ Strict quality control and safety standards
+ Highly customizable solutions
+ Durable and puncture-resistant
-
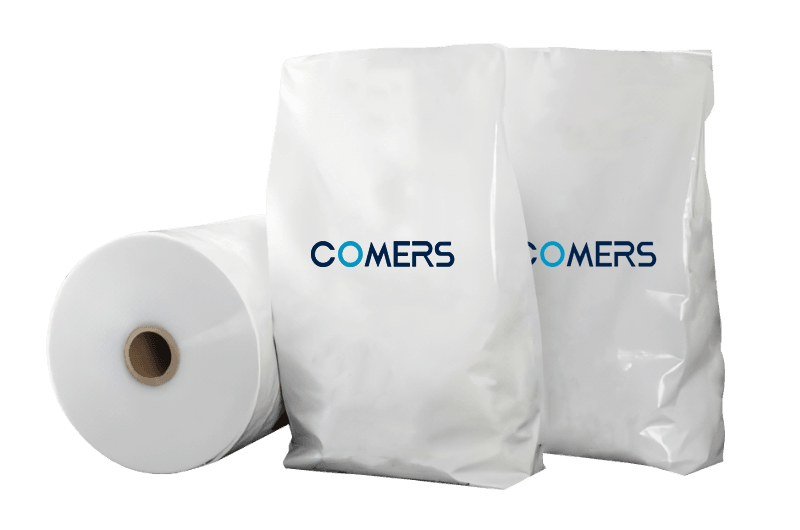
Intertram®FFS Liners
+ high barrier performance
+ prevent from moisture, oxygen(low WVTR<3.0,OTR<1.0)
+ various film types and thicknesses (Length:1M1-2M2 Thinkness:30-160um)
+ can replace Al material
+ High standard in food safety
+ Anti-static film (ATEX prevention)
+ Strict control over contaminants (BPA, Sakazaki-bacillus, etc.)
+ Tailored to customer needs
+ Enhanced product shelf life (approx. 6 months)
-
Washna ® Easy-peel films
+ prevent from moisture, oxygen(low WVTR<3.0,OTR<1.0)
+ various film types and thicknesses (Thickness:45 - 90um)
+ Clean & Safe Delamination
+ smooth sealing layer without wire drawing
+ Optimal Peel Performance
+ Good control level of black dot crystal point, in line with GB/T28117
+ Food contact safety
+ High durability
+ Superior barrier properties
+ Child-friendly opening
+ Clean, residue-free peel -
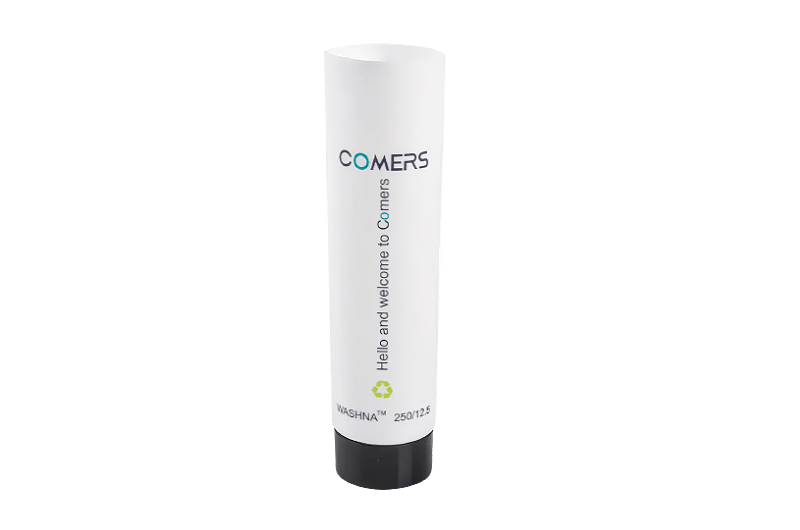
Washna® toothpaste films
+ Suitable for products in paste form
+ High stiffness and good mechanical properties
+ APR approval, Blow-molded in a single blow-molding
+ EVOH≤5%, in line with CEFLEX
+ white/transparent/ultra-white variants (customizable whiteness)
+ Precise thickness control (175−350μm±3%)
+ Excellent puncture resistance
+ Speckle-free surfaces (GB/T 28117 compliant)
+ Reduces environmental impact -
Washna® Laminate films
+ Operates with high-volume film
+ ultimate cost control
+ Good level of crystal point and black point control
+ Customizable with thickness and EVOH ratio
+ Easy-open End (EOE) functionality
+ Preserves freshness and extends shelf life
+ Odor-neutral composition
-
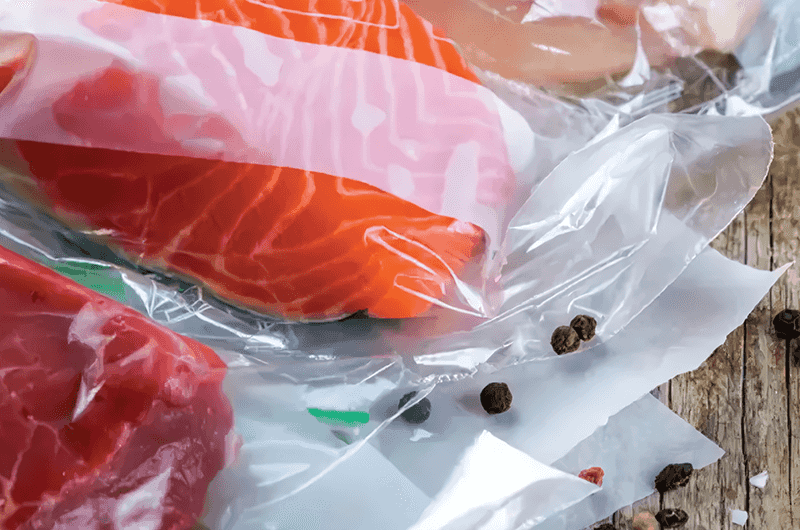
Agometa ® Frozen Vacuum Packaging Bags/Films
+ Excellent transparency
+ Good barrier against water vapor and oxygen
+ Heat sealing performance
+ Adds ultra-high barrier properties
+ high-end food market
+ stable performance, flexible and versatile
+ Good puncture resistance
Jiangsu Comers Neo Materials Co., Ltd.
No.161 Cailing Road, Linhu Town, Wuzhong District, Suzhou City, Jiangsu Province, China.
+86-0512-66558319
E-mail: [email protected]
